By Dan Beard

Take a piece of straight wire (size 20) equal in length to the measurement you made from root of tail to top of head; wind about it a bunch of excelsior (straw will answer as a substitute for excelsior shavings). Secure this to the wire by repeated wrappings of stout thread, and mold the bundle into a shape resembling the bird's body. Regulate the girth by the measurement you noted down for that purpose before you commenced the skinning process.
When you have completed the artificial body there will, of course, be a portion of the wire still bare, which represents the neck. File the extremity of this wire to a sharp point, then force it diagonally up through the skull to the top, where it must be clinched. Wrap the neck wire between the artificial body and the head with cotton batting (Fig. 149). Now draw the skin back so as to cover the artificial neck and body.
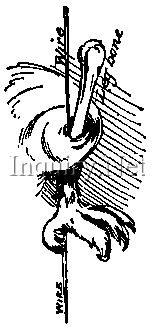
The eyelids must be carefully pulled in place over the cotton in the eye-holes, or orbits; pull the eyelids up nicely, to make the parts about the eye appear plump and natural. Push more cotton down the throat until it has a round, real look. For the legs use two pieces of wire, each sharpened at one end. The taxidermist must shove the wire through the ball of the foot and guide it with the other hand up along the side of the bones of the leg, the skin being turned back for that purpose (Fig. 150). This figure shows the leg with skin turned back, a it appears when the wire is pushed through.
Wind cotton around both wire and bone to the natural thickness of the thigh, and go through the same process with the other leg then push the wires clear through the artificial body and bend the protruding ends into a hook form (Fig. 151).

Taking hold at the part extending from the bottom of the foot, pull the wire of each leg down until the hooks fasten firmly into the body. The ends of the wires protruding from the foot are left to fasten the bird to its perch, which is done either by wrapping the wires around the perch or by thrusting them through holes made for the purpose and clinching the ends. With few stitches sew up the hole in the breast. For small birds this is not necessary. After your owl is set up in this manner, gather the wings up close to the body and fasten them there by thrusting two wires, one from each side, diagonally through the skin of the second joint.
If you wish the tail to be spread you must push a wire across the body through each feather.
Eyes may be made of white marbles painted yellow with black centers, but glass eyes are better and cost very little. To fix the eyes, put a touch of glue upon the cotton in each orbit and insert the glass eyes, being careful to place them properly under the eyelids. With a sharp needle pull the lids nicely in place.
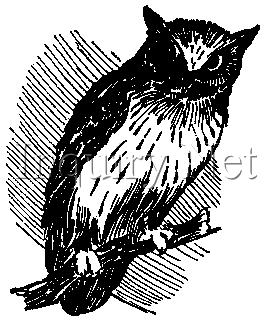
The stuffing of the bird is now finished, and it may be placed upon the branch in some natural position (Fig. 147).
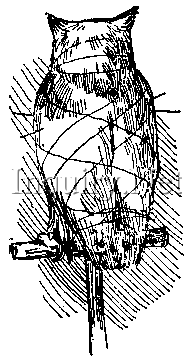
The attitude fixed, it only remains to put the feathers in their natural order as smoothly and regularly as possible, and to keep them in place by winding a thread over the body very loosely, beginning at the head and winding until all the feathers are secured (Fig. 152). The bird must be left in some dry place for several days.
When it is perfectly dry the thread may be taken off and all protruding wires cut close to the body. The specimen is now ready for the parlor or library.
The above directions, with very little modification, will serve for any other bird. For practice, a chicken is the best subject, as it is easily obtained and large enough not to be readily damaged by the awkwardness of a beginner.
The more tools you have the better, but if my reader has carefully read the foregoing description he must have noticed that during the whole process of skinning and stuffing the owl the only tools used were such as are within the reach of every boy--penknife, a paper-cutter, small spoon, and a thread and needle. Arsenical soap is the only material used not likely to be easily procured. This preparation is of course very poisonous and should be so labeled.
[Note: arsenical soap is no longer used for taxidermy, see Squirrel Study Skin].
It can be procured of any taxidermist or made by any druggist from the following recipe of Becoeur:
[Recipes Deleted]
Of course the young beginner will not need any such quantity as is represented in either of these recipes, but if he goes to the druggist that gentleman can make the soap in any quantity desired. The utmost care must be observed in handling this preparation and keeping it out of the reach of children and animals, although it is not very tempting in taste or looks and hence not as dangerous as other compounds might be.