Why shoulder a heavy load when you can easily slide it along behind you?
Additional Photos Below
 In winter, backwoods travel can be trying. Dealing with the cold can add 20
pounds of extra fuel, clothing, and equipment to your normal backcountry load.
Plus, deep snow slows your pace. In these conditions, trudging 6 miles feels
like running a marathon. But there's an energy-saving alternative to toting a
mammoth pack: plunk all that gear on an equipment tote sled, strap on a harness, and make like a
husky. Mush!
In winter, backwoods travel can be trying. Dealing with the cold can add 20
pounds of extra fuel, clothing, and equipment to your normal backcountry load.
Plus, deep snow slows your pace. In these conditions, trudging 6 miles feels
like running a marathon. But there's an energy-saving alternative to toting a
mammoth pack: plunk all that gear on an equipment tote sled, strap on a harness, and make like a
husky. Mush!
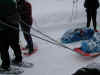
Towing a loaded equipment tote sled demands considerable stamina, but with the weight off your back and sliding along the snow, you'll travel farther and faster, and you'll be able to take longer, more comfortable strides, regardless of whether you're on skis or snowshoes. By increasing your range and load-hauling capacity, equipment sleds open the backcountry to more extensive exploration. You can cover more ground in a weekend, mount a 10-day expedition, or tow your kid on her first winter outing.
Some folks use their sleds to tote sirloins and fine wines to cozy cabins, while others lug cumbersome heaps of climbing or camera equipment. Keep in mind, though, that sleds are best suited to open, level terrain. On tight trails through dense woods, it's difficult to maneuver a sled strung out 6 feet behind you.
For arctic traverses and serious glacier travel, commercially made sleds offer premium performance and materials at prices approaching $500. For backwoods escapades closer to home, improvised equipment tote sleds make more sense. For less than $20, anyone with a drill and hacksaw can put together a dependable, versatile sled that will track smoothly across frozen lakes, and more important, stay off your heels on the descents.
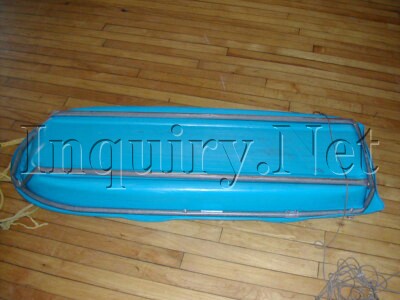
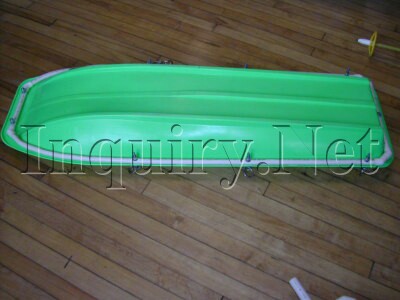
There are many different homegrown variations you can make. The version described here is simple, inexpensive, and functional.
MAKING THE EQUIPMENT TOTE SLED
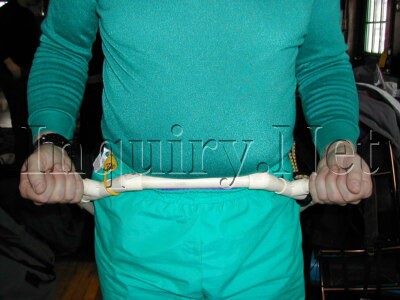
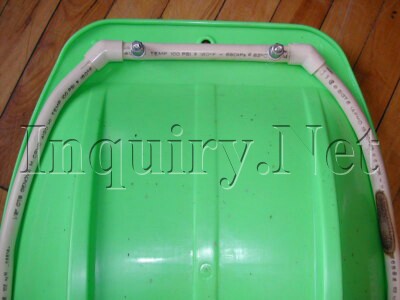
1. To determine the length of the PVC pipes, add 3 feet to the measurement of your ski from binding to tail or your snowshoe's full length. These tubes will hold the sled at bay on downhill runs so the back of your ski doesn't smack the bow of the sled when you take a full stride. A person 6'6", with long legs and 215 centimeter skis may need at least 6&1/2 feet of clearance to kick and glide cleanly. Someone with a short stride may need only 5&1/2 feet of pipe, but most folks will need about 6 feet. Most hardware stores will cut the pipe when you buy it. Otherwise, buy 8 foot lengths and trim with a hacksaw.
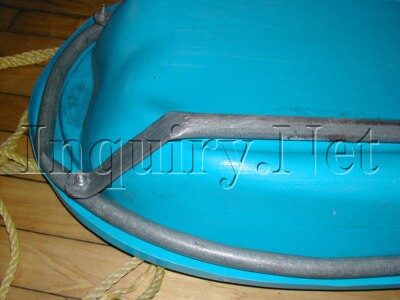
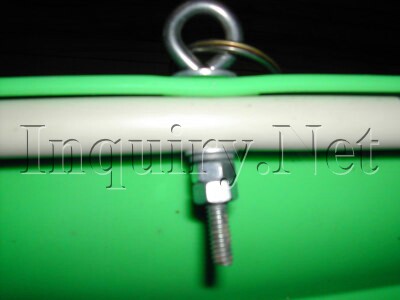
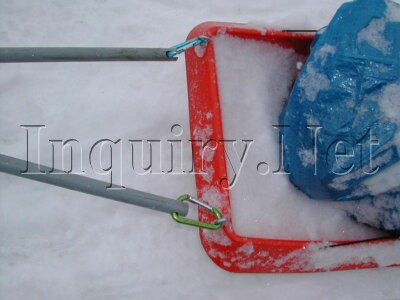
2. Drill two holes in the lip of your sled's bow or along its front rim, spacing the holes as far apart as possible. Thread the rope through the holes, leaving an equal length trailing from each side.
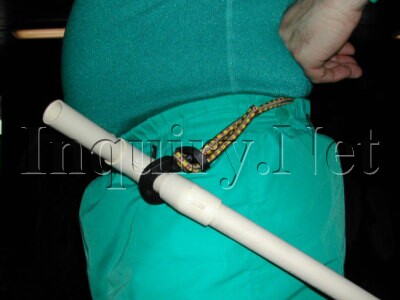
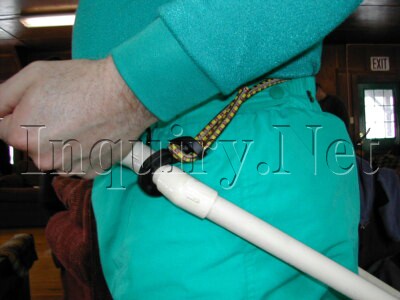
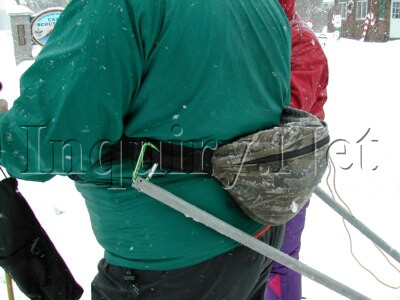
3. Thread the loose ends of the rope through the pipes, and tie or rig them to your hipbelt or harness. If your hipbelt is an external frame model with grommets on the sides, you can improve sled control and minimize lateral movement by drilling a hole near the end of each pipe, and securing them to the grommets with clevis pins. Pull the rope taut and tie a big knot in each end to prevent the rope from sliding back down the tubes.
4. Drill six holes around the lip of the sled (three on each side) for gear lashing points.
LOADING THE EQUIPMENT TOTE SLED
Like a ship on stormy seas, your sled should ride high at the bow with decent ballast in its belly. To prevent diving and tipping, place the heaviest part of your pack along the back and bottom of the sled. To keep out snow, cover your pack with a rain cover or tarp. Secure the load with rope or bungee cords. When spotty snow or a steep incline forces you to carry your pack, simply unhitch the pipes and lash the whole contraption to your pack like a turtle shell. It should weigh less than 5 pounds.
CUSTOMIZING THE EQUIPMENT TOTE SLED
To convert your sled into a kid-mobile, insulate the floor with a trimmed closed-cell pad or a narrow camp chair. Create handles for your little passenger by tying short lengths of rope into the holes you've drilled around the rim. Don't forget to carry a little cooking oil to grease the skids when you find the perfect slope for a joyride. It is a sled, after all.
Three Additional Variations


Finely Crafted on a Camp Bunk-bed